Full Guide: Host WordPress on AWS Lightsail with CDN
Recently, I started working on a new website project. The main purpose of the website is to stream a large number of videos on the home page in the fastest, most secure, and optimized way with a low budget. Traditional hosting servers like Hostinger, GoDaddy, and other service providers don’t handle such cases well, and WordPress itself is not designed for that purpose.
After doing some research, I came across AWS Lightsail, which is not costly and offers many features, and I learned that WordPress can be hosted on it. It was my first time using AWS Lightsail. I created an account and started setting up my website.
At first glance, the platform — full of options, features, and services — seemed really complicated and complex compared to other hosting platforms, which are easier to set up.
My Journey Building a WordPress Website Using AWS
Building an instance on Lightsail for WordPress was very easy. I also registered a new domain on Route 53, which was simple as well. I chose the region where my target audience is located, a great option in AWS for SEO and for achieving the best website loading speed. This way, users in the same region can browse the website in the fastest way possible.
AWS also takes care of security, reliability, and performance very well. I connected the domain to the Lightsail instance, and the website launched seamlessly & everything worked perfectly.
To continue the project, I needed to connect the WordPress website to CloudFront — and that’s where the challenge started. First, when you want to connect your website to CloudFront, you must host your website in Virginia instead of any other region. Unfortunately, I discovered this only after the website was already developed.
Since there’s no direct option to change the instance region, the only way was to create a snapshot of the existing instance, then launch a new Lightsail instance in the Virginia region. After that, I had to create an S3 bucket, set up a CloudFront distribution, connect them together, and then configure DNS and SSL certificates. It turned into a really complicated setup that honestly required the skills of an AWS engineer.
I searched, read documentation, and watched YouTube tutorials, but most of the resources were outdated or not helpful enough. After more than a week of work and searching, I finally discovered the easiest and simplest way to build a WordPress website on Lightsail and connect it directly to a CDN distribution.
I’ll share this method with you for free, for the purpose of knowledge sharing. I also truly recommend AWS as a hosting solution — it’s powerful, reliable, and cost-effective once you understand how to set it up.
Simple Steps to Build WordPress on Lightsail with CDN
Now, I will show you the correct and straightforward way to configure and set up a WordPress website on Lightsail and connect it to a CDN distribution. You can skip the hassle of complicated setups and follow this easy, clear, step-by-step guide.
1- Creating Lighstail Instance
First, you must create an AWS account using your credentials. AWS offers many free-tier benefits that you can take advantage of. After creating your account and logging in, go to the AWS console, select Lightsail, and open the Lightsail dashboard.
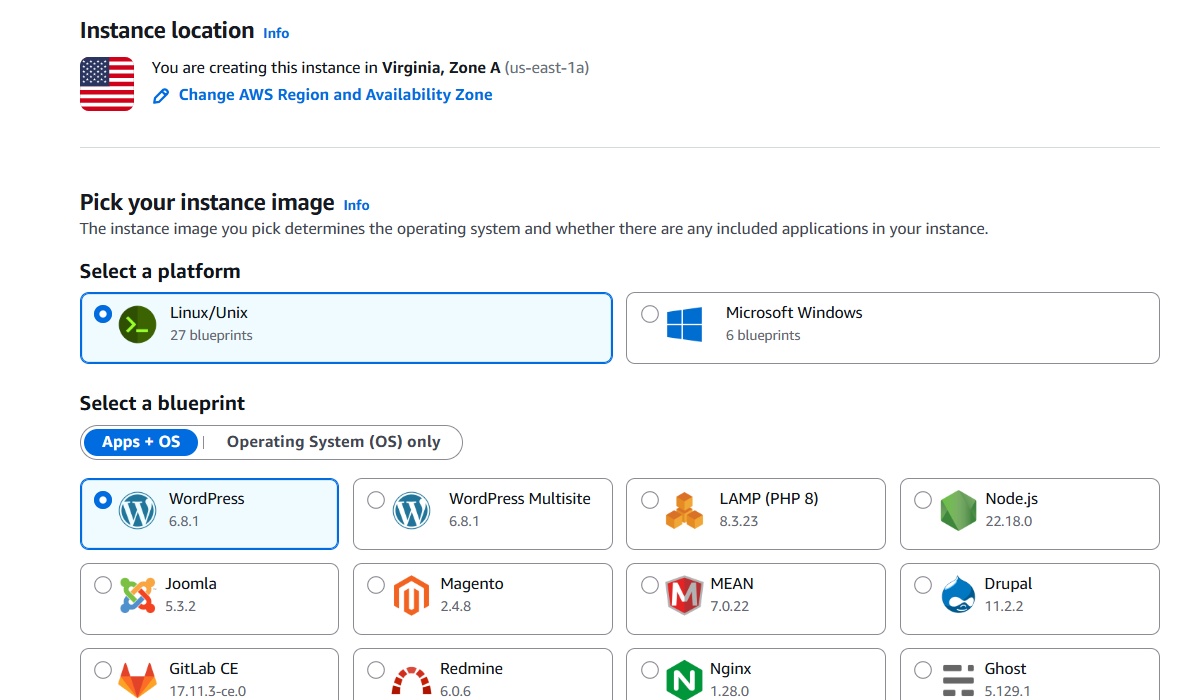
Within the Lightsail dashboard, click on Instances, then on the top right, click Create Instance. A new window will open for instance setup. You can keep the recommended settings for the hosting plan unless you want to choose another plan based on your website requirements.
Be careful when choosing the region:
If you are building a small WordPress website and not a heavy site, you can choose a server region close to your target audience.
If you plan to connect the website to CloudFront CDN, you must choose the Virginia region. This is very important.
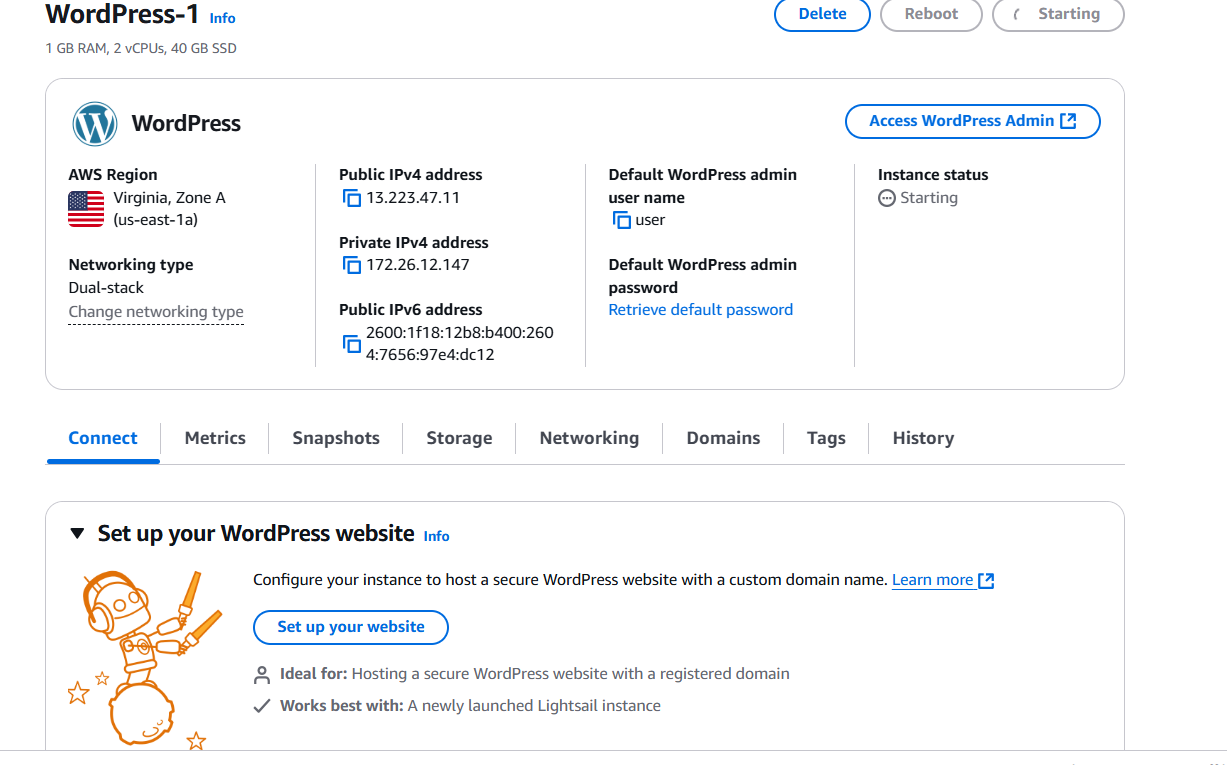
Wait a few minutes until the instance is created and started. Then, click on the instance, and its dashboard will appear.
You can access your WordPress site by clicking Access WordPress Admin. Alternatively, you can retrieve your default WordPress username and password by clicking Retrieve Default Username and Password. The steps using PowerShell are straightforward and easy to follow.
Connect WordPress to Domain name
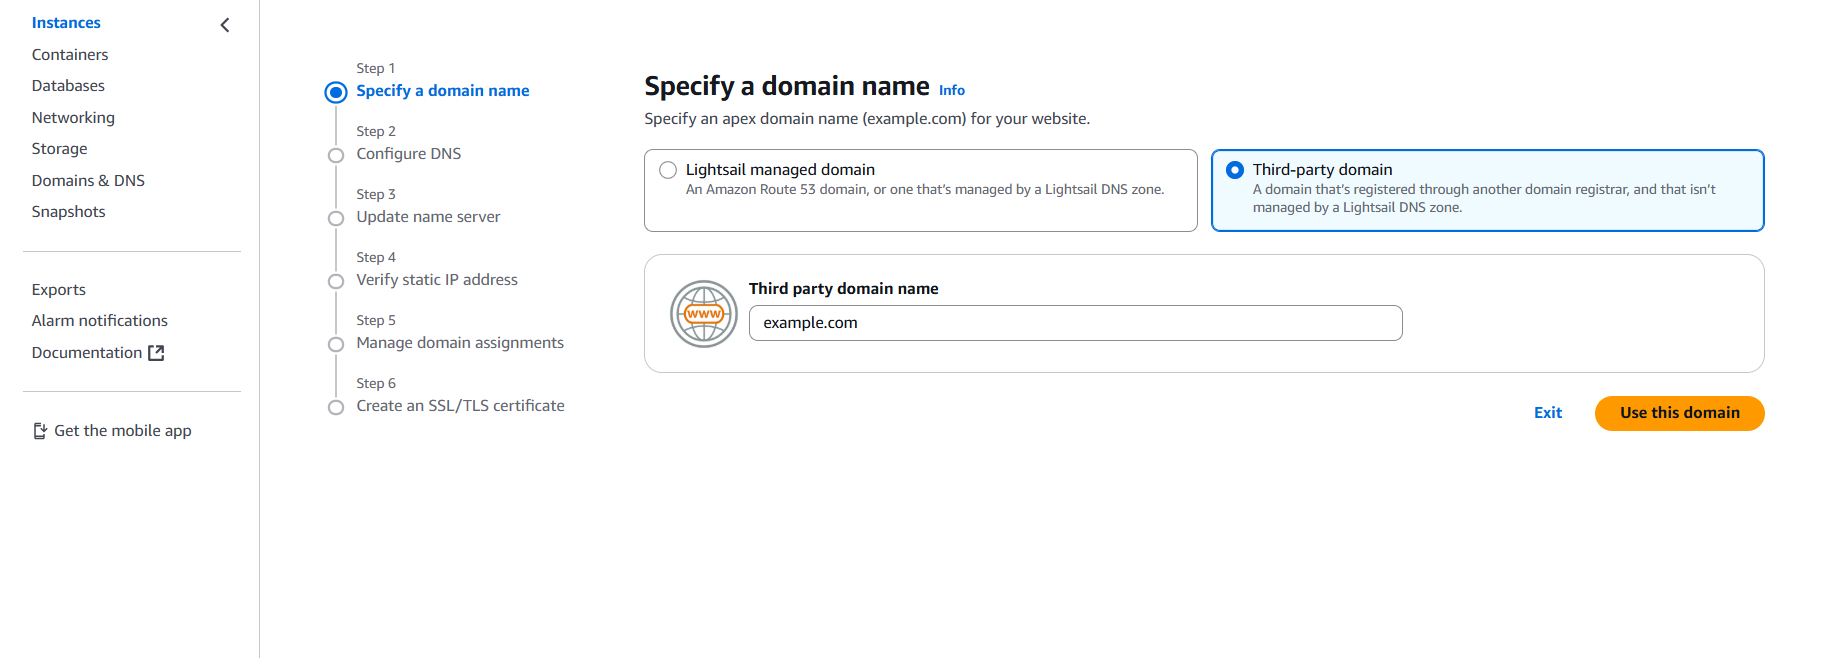
Now, let’s connect your website to a domain. In the Connect tab, click Setup Your Website.
If you already have a domain outside of AWS, choose Third-Party Domain Name and add your domain.
If you don’t have a domain, stay with Lightsail-Managed Domain and click Register New Domain. This will take you to Route 53, where you can follow the steps to purchase and register a new domain.
After registering the new domain, it will appear under Specify Domain. Select it and continue. Lightsail will automatically create a hosted zone, update the name servers, and generate SSL certificates. Keep the recommended settings until the process is finished.
The steps are very straightforward and easy to follow.
Creating Distribution
Create Your Distribution
In the Lightsail console, go to Networking.
Click Create Distribution.
Choose the recommended settings for WordPress and select your preferred plan.
Wait for the distribution to be created.
Access the Distribution
Once ready, go back to Networking and click on your Distribution to open its settings.
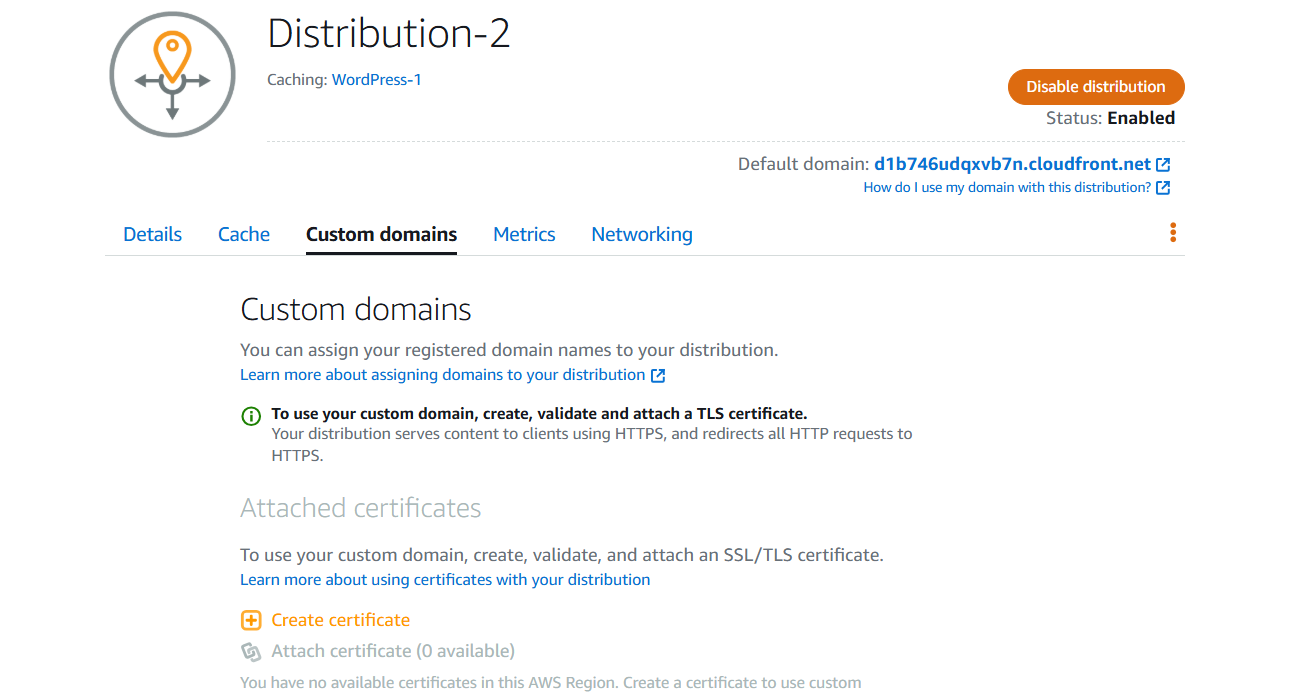
Set Up Custom Domain & SSL
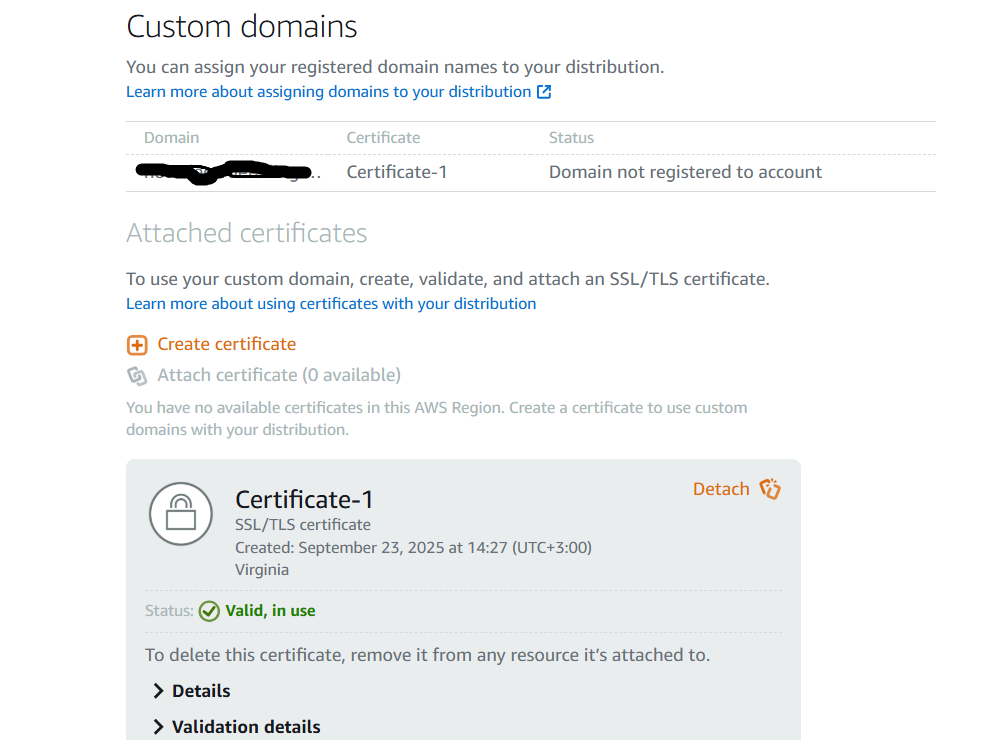
In the distribution settings, go to Custom Domain.
Click Create Certificate to generate an SSL certificate for your domain.
Wait until the certificate is issued.
After the certificate is ready, attach your domain to the distribution.
The status will change to Valid and In Use.
Locate the Distribution’s Static IP
After the distribution is created, a new static IP will be automatically generated for it.
Go to Networking → Static IPs. You should see:
One static IP for your WordPress instance
One static IP for your CDN distribution
Point Your Domain to the Distribution
Go to Domains & DNS in Lightsail.
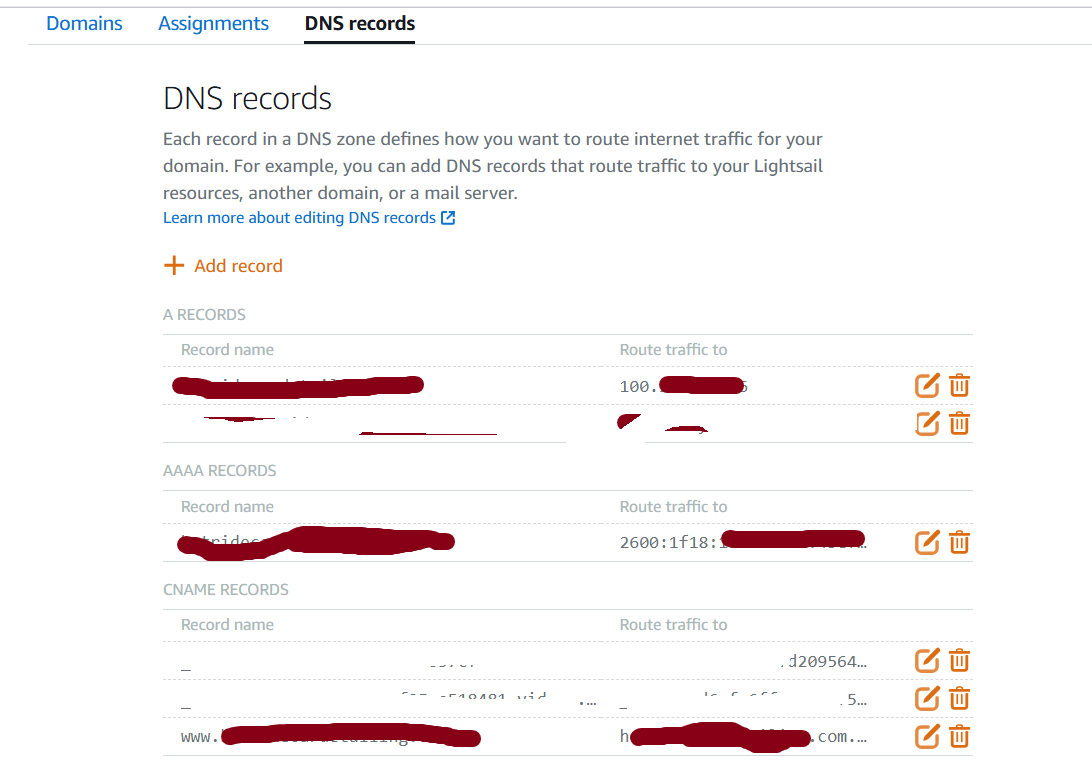
Click on your instance, then go to DNS Records.
Update the A record to point to the distribution’s static IP:
Record Name      Route Traffic To
example.com      <Distribution Static IP>
Create a CNAME record for the
wwwsubdomain pointing to the root domain:www.example.com → example.comLeave all other DNS records as they are.
Finalize & Test
Wait a few minutes for DNS propagation.
Access your website using your custom domain. The site should now be served via the CDN with SSL enabled.
Test by inspecting network requests to ensure static assets are delivered via the CloudFront distribution.
Add Your Heading Text Here
- Instance Creation and DNS Records
When you create a Lightsail instance, DNS records are automatically created for your domain, with the A record pointing to the instance’s static IP.
CDN Distribution and DNS Update
After creating a CDN distribution in Lightsail, you must update the DNS zone. The A record that was pointing to the instance IP should be changed to point to the distribution’s new static IP.
SSL Certificate Considerations
When creating a certificate for your distribution, if you encounter an error, it is usually because your domain is still pointing to the old instance IP instead of the distribution IP.
Updating the A record to the new distribution IP resolves this.
Secure HTTPS Access
The SSL certificate allows you to access your website securely via HTTPS.
The default CloudFront domain (e.g.,
xxxxxx.cloudfront.com) is not directly accessible, which is normal. Your website should be accessed using your custom domain configured with the distribution’s IP.
Hopefully, this guide will help you create a secure, fast, and high-performance WordPress website, whether it’s for e-commerce, a portfolio, or a blog.
For further assistance, you can contact us via email at inquiries@shiftlb.net or reach out on WhatsApp +961 71 035 188.